Category: Uncategorised

  • 8. Response Posts (5-6)

    Topic 5 – User Testing & Community Feedback

    What methods can you make use of for testing your code and hearing feedback on your contribution? How do you communicate with your community and audience while developing work in progress or sharing the final outcome?

    As mentioned in earlier blog posts, most of the testing and iterative development for my project, both code and curriculum-wise, happened during the teaching itself; it served as a kind of test flight for the first round of improvements. When I explained basic concepts and the student didn’t understand, they would ask for clarification, and I would add comments live. If they felt my speech needed to be clearer, I would adjust my delivery in real time. When they were confused, I walked them through the material step by step. This immediate feedback loop helped shape the content quickly and responsively. I also took note of longer-term feedback to implement when I have more time, such as restructuring and extending the curriculum, as I could not do them now itself. I also ensured to show the student the changes they had proposed, so that they know their feedback was taken into account and implemented as a priority.

    For longer-term feedback from the student collected after classes, and in line with my own goals, I have several points for future improvement. These points are also informed by several resources on community feedback. I wanted to implement this soon, so I could initiate a PR with a more professional project next time.

    Improvement Plan

    1. Improve Communication for Teaching
      • I was told I mumble and skip stuff sometimes, or assume a knowledge basis students don’t have, so I strived to improve this for each lesson, and will continue to do so.
    2. Expand Participation
      To increase peer feedback and engagement, I want to invite more animation students to join this collaborative learning process, encouraging a diverse range of perspectives and active involvement, as more critique = more opportunity improvement.
    3. Encourage Peer Critique
      I want to foster a supportive environment where students actively engage and feel free to say any shortcomings of this project. To do this, I may use Padlet as a platform where students can give feedback anonymously if they prefer. As well as this, students should be able to join dedicated discussion channels around the workshop, like on Discord or Slack, so we can get together and discuss next steps. This safe space will encourage honest and constructive critique without fear of judgment. In the very next lesson, I will show students how their feedback was implemented or explain the reasons for rejecting certain suggestions, reinforcing the value of their input.
    4. Gauge Student Engagement and Motivation
      After each class, I plan to measure key indicators of student engagement using Google Forms or Padlet:
      • How motivated students feel to complete their homework assignments
      • How well they understand the material presented, and what additional support or resources could enhance their comprehension
      • How much they retain and can recall from the example demonstrations
    5. Assess Understanding and Retention
      To deepen this insight, I will ask student/s to recall examples from class during follow-up sessions. This will help me gather heuristics on their knowledge retention and comprehension, as I noticed that they had usually forgotten what happened in the previous lesson by the time the next one came. This can be at the very start of the next lesson. For this, regularly scheduled classes is also important.
    6. Standardise Lesson Timing & Duration
      • This was of course important, as long gaps meant forgetting material and unfamiliarity, short gaps make i overwhelming, long lessons are no fun, and too short means there are few takeaways.
      • I did not have this in place yet as it was still in development stages, but the curriculum on the site will be changed accordingly once this has been decided.

    On the p5.js community side, from my research, the usual process is that community reviewers either provide feedback or reject the contribution. In the latter case, I would follow up through the appropriate channel to understand why and improve accordingly.

    References

    https://docs.github.com/en/github/site-policy/github-community-forum-code-of-conduct

    Resources

    Topic 6 – Contributing Beyond Code

    What other forms beyond code can complement your contribution? How can you improve the outreach and accessibility by considering other non- code related contributions?

    Beyond code, there are many non-technical contributions that can significantly enhance my project’s outreach, accessibility, and overall impact. I could create video tutorials to support different learning styles and work on refining the user interface and visual design to make the platform more intuitive, as I have seen people do on the p5.js Education Resources website. I am interested in doing this, but only once I am confident in my class materials – when I improve them, and extend them, and gain feedback until feedback is few, I could work on this.

    Accessibility improvements; such as adding screen reader support, alt text, and keyboard navigation; would make the project more inclusive. I can also contribute through more thorough documentation, more engaging website with more depth, user guides, and translations to reach a broader audience, or even one day, making my project a big enough community such that others can contribute their translations. Engaging with the student community through Q&A sessions, feedback forums, and social media updates can also create a sense of collaboration and belonging. Additionally, I could run user testing to identify usability issues and incorporate their feedback. Developing branding materials, and even integrating the project into lesson plans can further broaden its reach and value. These non-code efforts are vital to ensuring the project grows in a sustainable, inclusive, and community-driven way.

    I aim to make this project more professional and with better outreach, step by step. I found some good suggestions from opensource.stackexchange, some of which I tweaked for relevance, namely:

    1. Try looking for a forum which have people who can be a part of this workshop, and ensure it is free, with clear rules for sign-up and partaking.
    2. Writing a blog post illustrating my project in more detail, and attempt to publish it.

    Resources

    https://dev.to/mattdark/a-non-coders-guide-to-open-source-contributions-13ji

    https://opensource.stackexchange.com/questions/2933/how-can-i-grow-my-open-source-project#:~:text=The%20average%20end%20user%20isn,a%20site%20for%20the%20project.

  • 6. Initiating PR

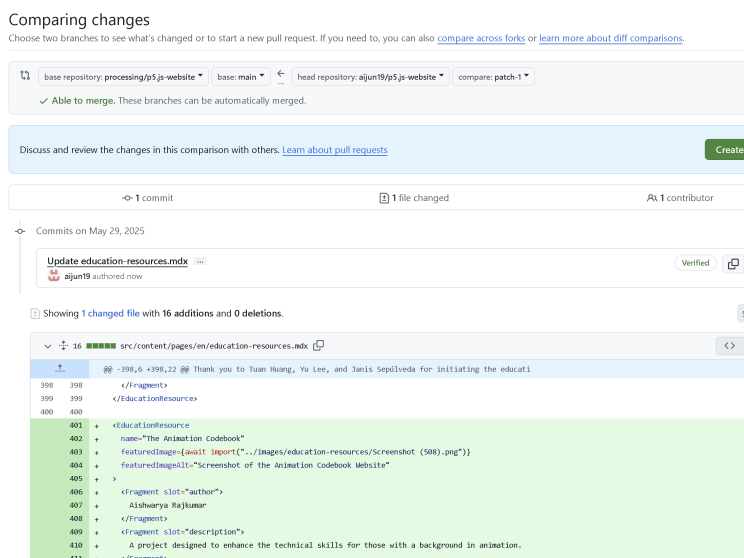
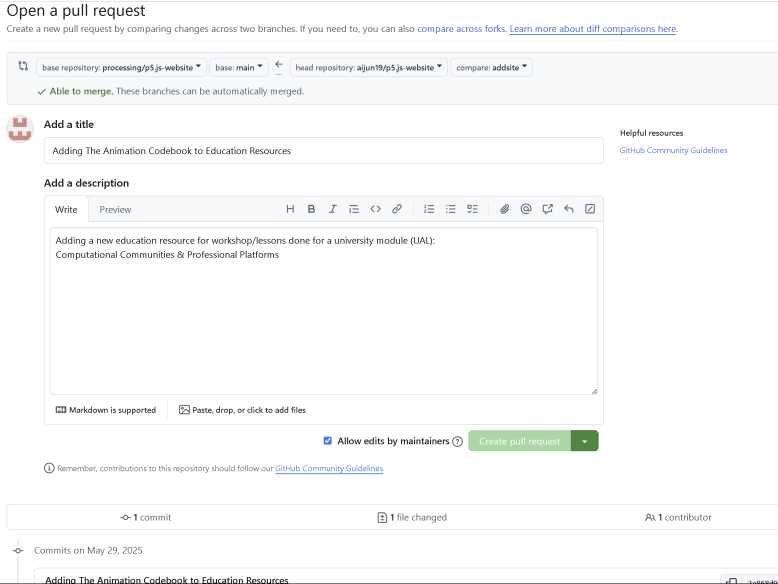
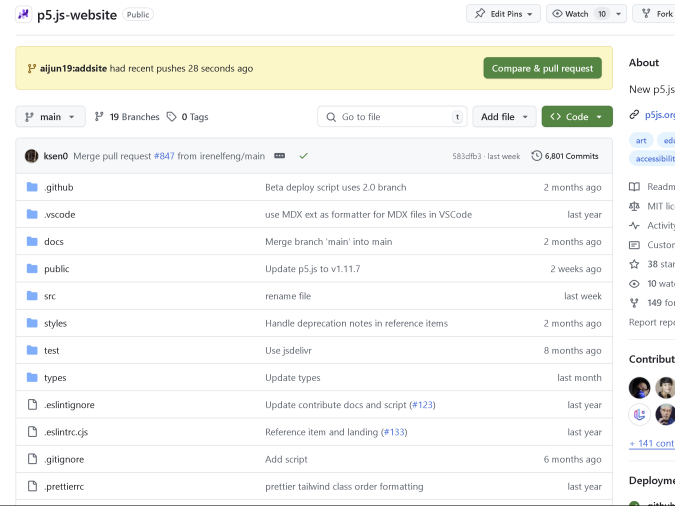
    After the site was hosted, I began attempting to initiate a PR. This was quite confusing and intimidating for me, but I wanted to at least figure it out and learn about doing the PR, even if it was not much back-and-forth, and I did not expect an answer.

    The quality of my work was not yet at professional level, as I was still aiming to improve it and expand the project, but I did as much as I could before initiating the PR.

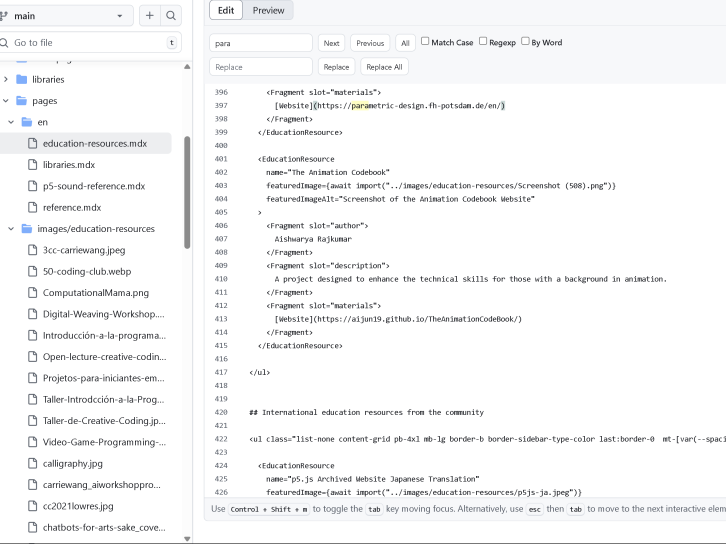
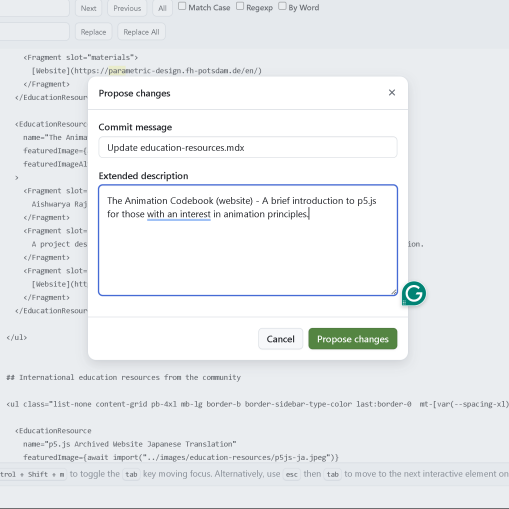
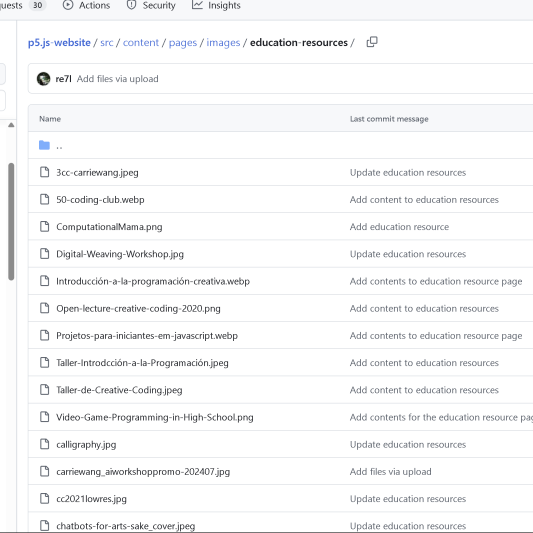
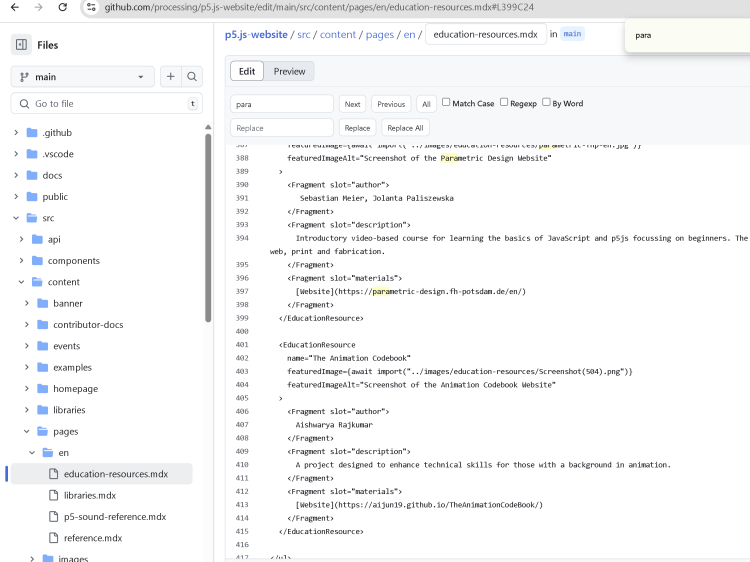
    When I looked through the code, I realised I would have to add a photograph in a separate folder, as well as the proposed change to the site which would add my education resource in. I was very confused on how this worked, but I added my changes and proposed them.

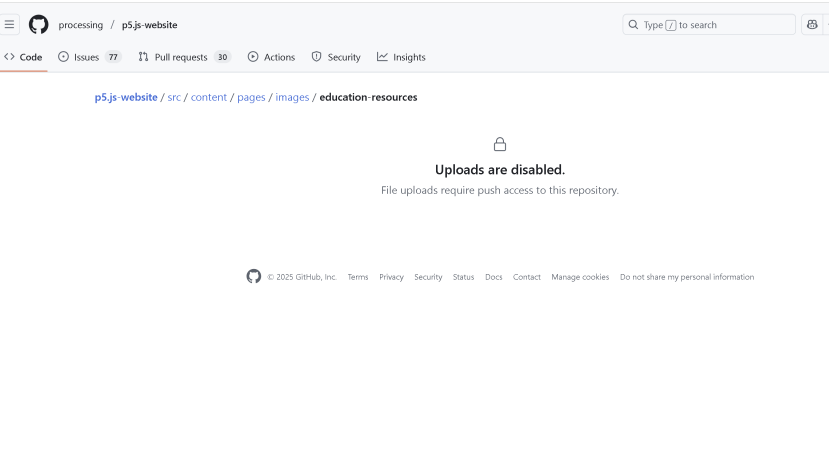
    I realised that there was not really any way to add or propose to add the photo as well. Th only upload options were code/text files, and I needed my image in the image folder to propose this change.

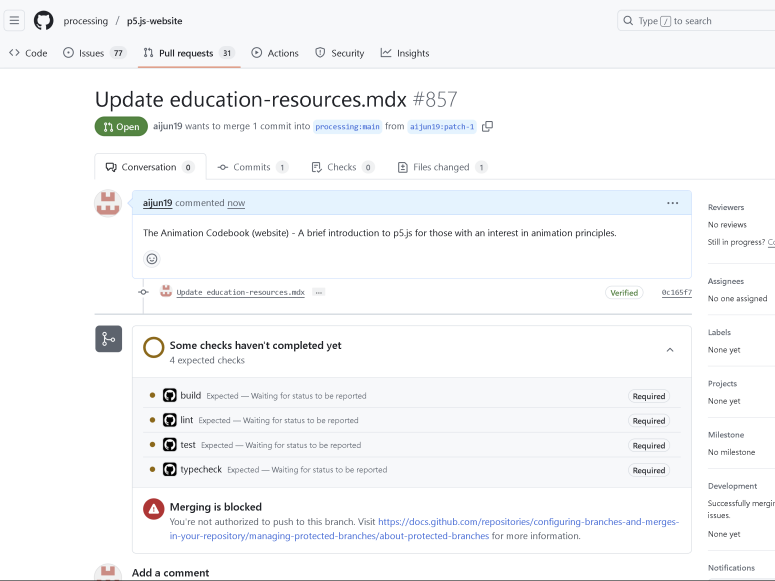
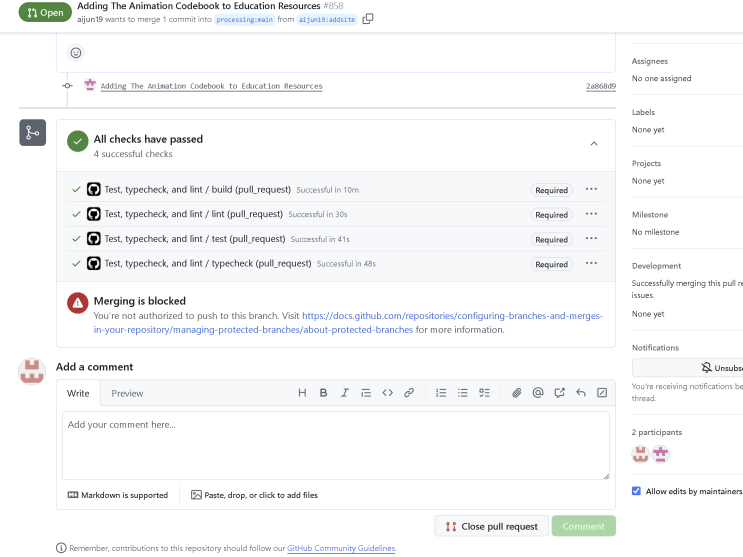
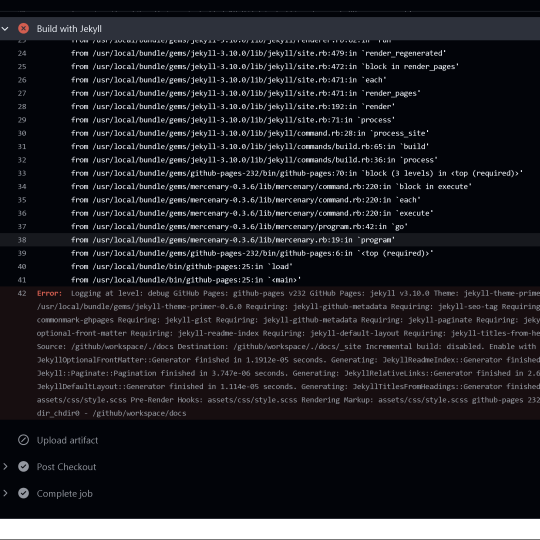
    I then realised that none of the checks were passing. This was quite daunting for me as I was really unsure in which direction I was meant to proceed. Although it was already known to me that the website being merged was not in my expectations any time soon, I still wanted to figure out how to do this, so in the future when I improve and expand the website and project, I would know exactly where to go and what to do.

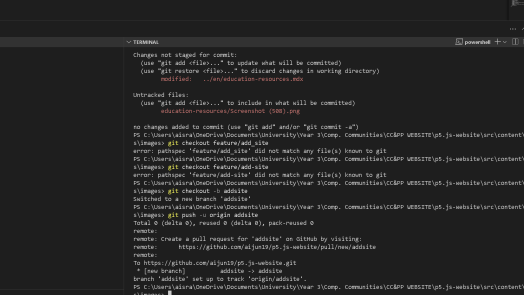
    I realized that I needed to connect my VSCode to GitHub, create a new branch before making changes, and then propose those changes through a pull request. After stumbling through a few tutorials and help guides, I finally figured out the correct workflow.

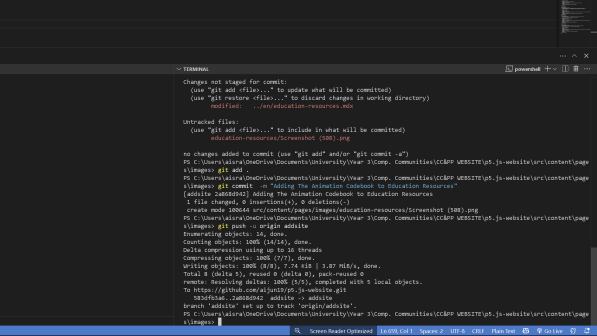
    I added my proposed change to the educational resource website, placed the image in the correct folder, wrote a clear commit message, and successfully pushed my changes to GitHub via my new branch.

    Once this was done, I could create the pull request. This time, all the checks passed, and I was finished with my PR.

    After learning how to properly link VSCode with GitHub and manage branches, I aimed to continue improving the website—enhancing its content, quality, and aesthetics—while steadily pushing my changes.

    Reflecting on this experience, I found it to be a really valuable and unique way to engage with an open source community. This project involved many interesting facets: an open source curriculum and website, openly shared educational materials, and open-source tools like p5.js. It’s exciting to see how these elements come together to slowly build a community of learners collaborating and growing together. I hope to improve everything that I noted down and expand and get even more feedback before initiating another pull request, as well as making more professional the student work repositories and curriculum, lengthening and making them detailed as well.

  • 7. Response Posts (1-3)

    Topic 1 – Licenses

    How did the lecture on copyleft licenses informed your license choice?

    As the creator and contributor to an open-source project, I had to make sure licenses were researched and added wherever necessary as a key part of maintaining good open-source practice.

    Since my project is multifaceted—comprising a website, a public repository for student work, individual code files for each lesson, and the lesson delivery itself—I needed to address licensing and attribution carefully for each part, or at least make a clear attempt to do so. This involved adding appropriate licenses and ensuring proper attribution, all of which is documented transparently. As this was quite an unconventional project, there wasn’t much direct guidance provided in class, and I didn’t have sufficient time to ask all the questions I wanted. Therefore, much of my approach has been based on general research, after-class materials, and my own judgement. Naturally, I expect to refine and adjust this as I progress further into the project.

    Initially, I was hesitant and confused about why such a simple piece of code for teaching coding would require copyright protection. The code was straightforward and simple so it seemed unlikely that it needed legal safeguards. It was probably similar to code found elsewhere, as it mainly demonstrated the foundational principles of the curriculum, with a few additions and lesson notes.

    As I explored licensing further, I came to understand its importance. Although the code itself was simple, it formed part of a larger & structured curriculum. Within this context, the code served a specific and intentional role in delivering educational content. Its value lay not in complexity but in its function as part of an integrated framework. This gave the work meaning, coherence, and originality as a component of intellectual property. That insight made clear why copyright is not only applicable but essential—it protects the integrity and authorship of the entire curriculum, not just isolated parts.

    While I wrote the code modules, I recognise that both the code and curriculum were influenced by many sources: previous lesson plans and open educational resources. Although I may not be able to directly attribute my code to others, it is natural that simple concepts reflect those of earlier contributors. For this reason, I committed to transparency and respect for the collaborative nature of educational content. I wanted thus to go with a permissive license that allows others to freely use, adapt, and build upon this work, just as I have benefited from the contributions of others.

    After reviewing various licenses and studying class materials on copyleft—which allows others to freely use, modify, and distribute a work as long as derivative works are shared under the same license, unlike traditional copyright that grants exclusive control to the creator—I chose the Creative Commons Attribution (CC BY) for my curriculum and site, which is the most permissive. Creative Commons licenses are tailored for non-software creative works, such as lesson plans, textbooks, website content, videos, and other educational materials. They offer flexible terms for sharing and attribution that suit the way creative content is typically reused, adapted, and credited, which was suitable for my intent to openly share educational resources while ensuring proper recognition. For my coding, I opted for the standard MIT License. For the coding parts themselves, the MIT License is specifically designed to handle software and code. It allows others to freely use, modify, and distribute the code in my teaching curriculum with minimal restrictions, while legally protecting me as the creator. This made it ideal for the programming examples within the curriculum.

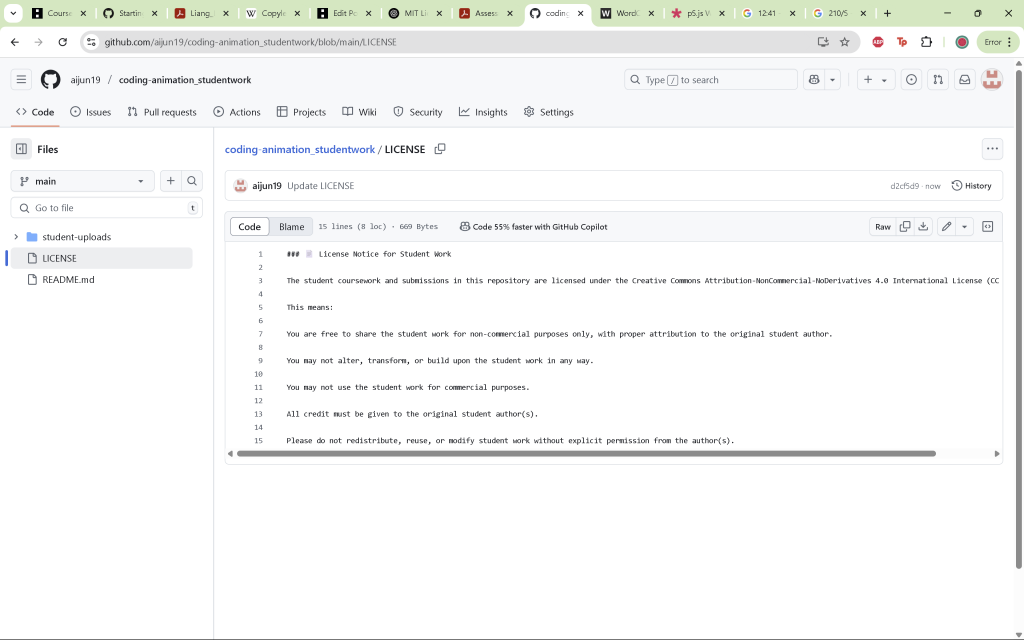
    For the student work repository, I applied a more restrictive Creative Commons licence—the Creative Commons Attribution-NonCommercial-NoDerivatives 4.0 International Licence (CC BY-NC-ND 4.0)—to respect students’ ownership of their work and prevent unauthorised reuse or modification. Despite researching, I was unsure if this was best practice: whether to use the same licence as my curriculum or code, since the student work is derived from there, or to restrict use entirely, as the work isn’t technically mine. Since these student responses and assignments are their original creations based on my curriculum, I concluded from class sources and my own research that they retain ownership and may not want their work freely copied, altered, or used commercially without permission. The more permissive MIT licence would not adequately protect their rights, so I chose the more restrictive Creative Commons licence.

    Separating the licenses helped me start to learn and understand how each part of my project can be used, even though there is a long way to go. The code portions are governed by the MIT License, enabling technical reuse and development, while the overall curriculum and website content fall under a Creative Commons license to encourage sharing and adaptation with appropriate attribution.

    References

    https://pzwiki.wdka.nl/mediadesign/Open_licenses

    https://labs.creativecommons.org/2011/demos/license-layers

    https://opensource.guide/starting-a-project/#your-pre-launch-checklist

    https://mit-license.org

    https://monoskop.org/images/1/1e/Liang_Lawrence_Guide_to_Open_Content_Licenses_v1_2_2015.pdf

    https://en.wikipedia.org/wiki/Copyleft

    https://pzwiki.wdka.nl/mediadesign/Open_licenses

    https://opensource.org/osd

    Topic 2 – Open Source Collaboration

    How did different presentations and study cases on open and collaborative coding projects inspire your approach to your contribution?

    Based on the lecture on open-source collaborative production case studies and my own research into collaborative coding projects, my main inspiration came not from the case studies themselves but from the governance models section. I was particularly drawn to the founder-leader model and the idea of a Benevolent Dictator For Life (BDFL). This model is most common in new or small projects where the individual or group who started the project administers it, sets the vision, and controls code merges. I really like this approach because it offers me a lot of personal freedom. I also explored p5.js education resources and noticed many amazing open-source lessons and workshops are led by one or two people who designed them themselves. I love the idea of pioneering something, leading a small group or one-on-one sessions that gradually grow, while I maintain the creative vision and direction for the project.

    Even though my project started small with one-on-one lessons, as mentioned and demonstrated in the lecture, the founder-leader model’s limitations became clear as it grew. Founder-leaders can become bottlenecks for decision-making. Although I started the project, managing everything alone became overwhelming, and I began to wonder if I should have adopted more of a do-ocracy approach, where governance is more implicit – but ultimately, I did not have the capacity to be able to find and approve collaborators for this project, which might have been a really good add to better the outcome.

    In the Week 9 lecture, we discussed the prompt:

    “Starting your own open source project usually means also being a maintainer. Being inherently public and collaborative, how will you work with people and diverse feedback? How can you ensure the community around your project is healthy and inclusive?”

    This got me thinking about my own approach. I planned to hold the workshop/lessons with just one person and get deep feedback—since I don’t know many people—but with the goal to gradually expand to other animation students and iteratively improve as I gained feedback each time. Because of this, my first conducting of the lessons and the lesson delivery was somewhat unconventional. Instead of following a strict chronology, there was a lot of back-and-forth about what was clear, what could be added or removed, and even how my speaking style might change for clarity. I documented all feedback and implemented it as best as I could within the timeframe, and I recorded this process in my blog.

    Looking ahead, for a larger and more refined curriculum and workshop, I hope to use open Padlets provided after a lesson, as we do in class, to gather anonymous feedback continuously, remain open to critique, and follow open source best practices, such as creating a clear code of conduct (which I have yet to explore in depth). This project has been very personal and enjoyable for me—more so than a typical debugging or translation task—because it is hands-on and collaborative, and I had more control over it, which worked well for me. I’m excited to extend it in the future.

    References

    https://opensource.guide/starting-a-project/#your-pre-launch-checklist

    https://www.redhat.com/en/blog/understanding-open-source-governance-models

    Topic 3 – Community

    What strategies and methods did you find relevant when coming closer to the communities and projects you are contributing to?

    My communities were two-fold. On one hand, the student I worked with and the prospective students formed my immediate community. On the other hand, I hoped that my educational resource built with p5.js could eventually become part of the broader p5.js community, gaining recognition and being featured once it grew large and polished enough.

    In terms of the first community—the student I taught and prospective students—the biggest factor that helped me engage better was confidence. My first two lessons were a bit shaky, but as I delivered more, I became more assertive, and that confidence translated clearly across the screen. I learned that in a founder-leader governance model, when the community or individual believes the founder knows what they’re talking about, they engage more actively and learn more effectively.

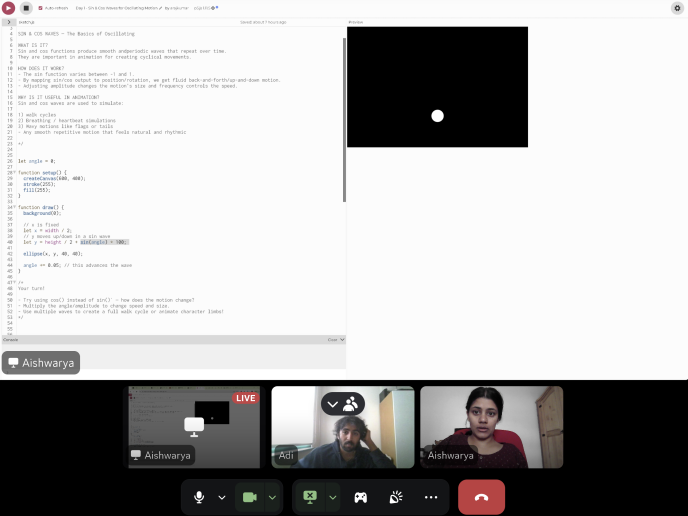
    The second key learning was the importance of being available and supportive. While this level of involvement might not be typical in larger communities, because this was a 1-on-1 setting, I could jump on calls whenever I was free to walk them through confusing parts—like when my student couldn’t understand my documentation. I helped them live by improving the repo together, adding code comments, and explaining things in real time and repeatedly. I realised how effective live, hands-on collaboration can be in fostering community engagement, even if it’s not always scalable.

    This led me to think about sustainability. To make students feel supported even when I’m not there live, I want to include fun video recordings, supportive materials, other people’s perspectives on the concept, and reading resources—so there are multiple learning paths available for every lesson.

    Finally, it was important to show students that their work and feedback were valued. I did this by incorporating their suggestions into future lessons, openly acknowledging their input, and protecting their contributions with the right license in the student work repo.

    In terms of the p5.js community itself, I was only able to initiate a pull request fairly late into the development of my lessons, curriculum, and website, so I didn’t expect much back-and-forth or interaction to help me understand what an effective communication strategy might look like. Through the pull request I initiated, I learned more about the technical process, codes of conduct, and best practices involved in contributing, but less about the community dynamics themselves, since interaction was limited. However, I did notice that the p5.js community is quite diverse and welcoming to contributions of all levels—especially in the area of educational resources. This made me feel more at ease and welcomed. It also made me realise how important it is to display a diverse range of examples, so that contributors who might feel intimidated or unsure about the quality of their work still feel encouraged to participate. This insight led me to include a note in my student work repository stating that all kinds of work—unfinished, unpolished, or basic—were welcome. My aim was to create an encouraging environment that valued learning and participation over competition or perfectionism.

    When I had reached out for translations, I didn’t receive a response until much later, which made it difficult from these encounters to gauge how to engage effectively with the community. However, based on the class material on open source collaboration, as well as conversations with peers about their own contributions, I’m developing a better understanding of how to engage with such communities. In future, I plan to apply these principles by, for example, reaching out to moderators on platforms where they’re most active, often Discord, ensuring they are open to contributions, following any posted codes of conduct, and communicating through the appropriate channels.

    References

    https://dev.to/buildwebcrumbs/navigating-open-source-a-guide-to-effective-community-engagement-5gb9

    https://docs.github.com/en/site-policy/github-terms/github-community-code-of-conduct
  • 5. Website + Hosting

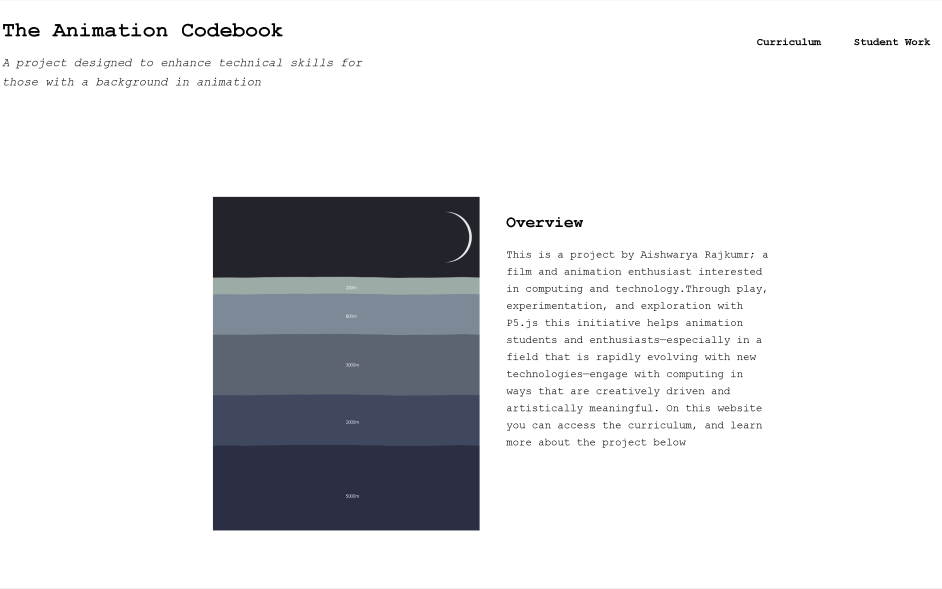
    Based on valuable feedback and my original vision, it’s clear that having a dedicated website for this workshop is a great idea. Somewhere where the curriculum is accessible, as is the introduction to what the workshop is about, and a place for student works to be seen.

    • The website will be open source, so everyone can see, contribute, and learn from it.
    • It will be educational, providing resources, examples, and guidance related to the workshop.
    • It will be community-led, meaning I will continue to improve it based on your input and suggestions.

    This approach ensures the workshop grows stronger and more useful for everyone involved.

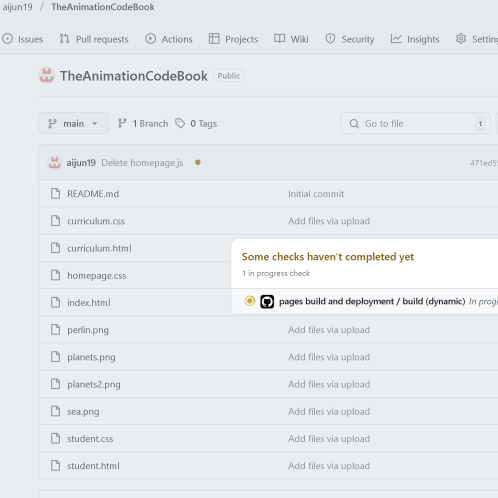
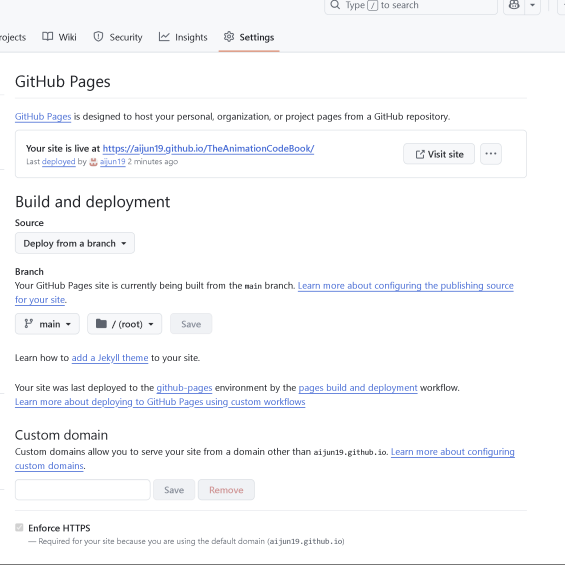
    Since this module focuses on open-source and community-driven learning, it was important for me to ensure that the website is accessible to all. Before initiating a pull request to have it hosted on the p5.js educational resources website, I wanted to publish it publicly on GitHub Pages. This is so that if the PR was accepted, my website would have a publicly accessible link via GitHub itself.

    Making the Website

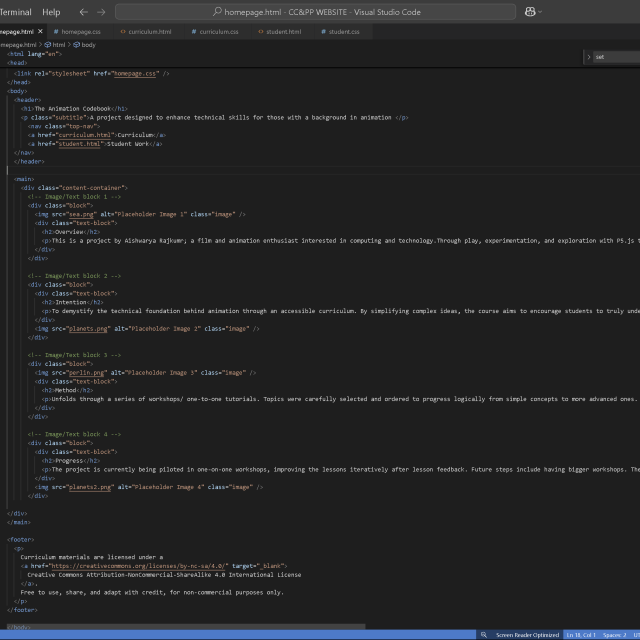
    This was a straightforward but slightly lengthy process as it has been a while and I had to touch up on some basic skills. I decided to keep it basic for now, but functional where it needs to be, and then continually push changes to GitHub to improve the website and its’ contents.

    Homepage

    I followed roughly the style of https://whoseai.net/, as I liked how clear it was about method, intent, and how simple it was. I did something similar.

    I added the licensing as mentioned in a previous blog post at the bottom of all pages.

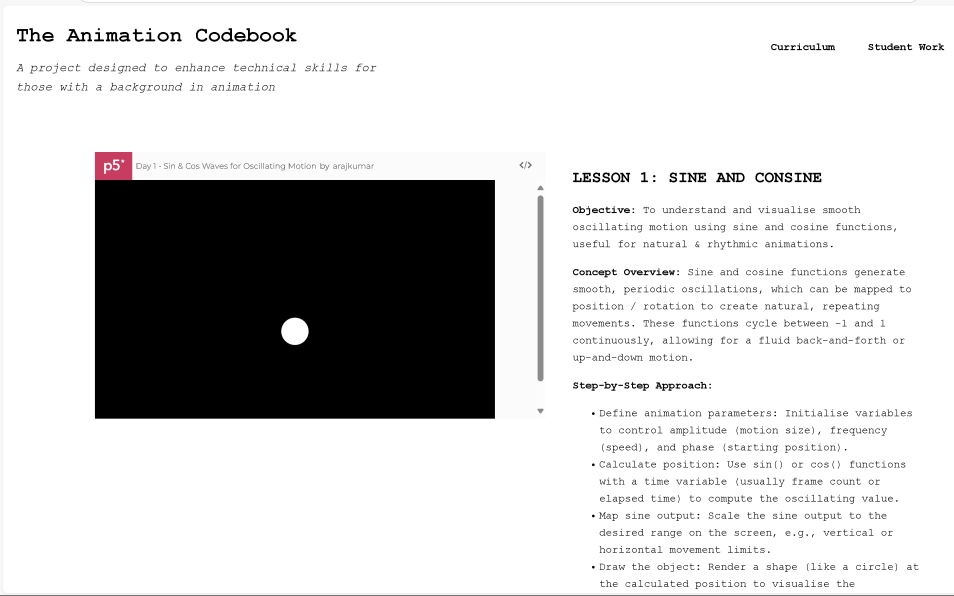
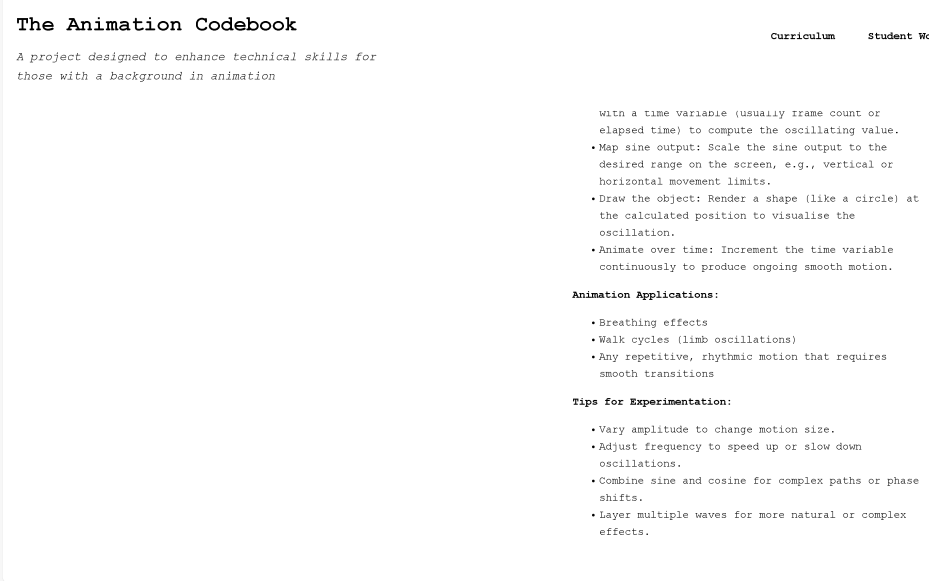
    Curriculum Page

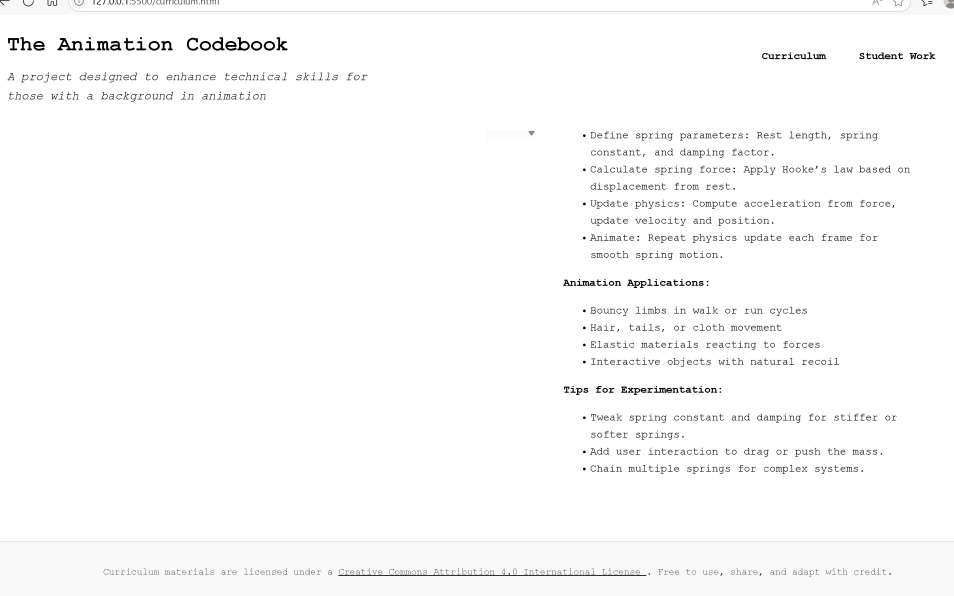
    I kept it quite straightforward here as well. I lacked time, but I needed to keep it essentialist, and make sure to serve the purpose. Any fancy appearances or details could be pushed as changes later.

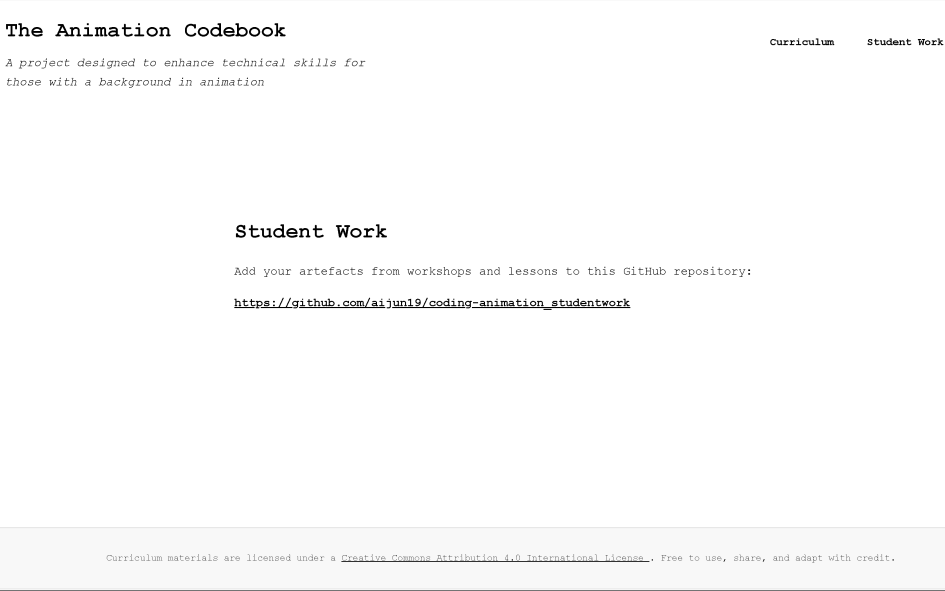
    Student Work Page

    This was just simply a link to the repository where potential students could fork and initiate PR’s with their files and class response works, and I could merge them to be a sort of ‘class artefacts’ or ‘student gallery’ display.

    Hosting

    With a little bit of figuring out, hosting was done on GitHub Pages. There were some difficulties at first but could be resolved in time.

  • 4. Lesson Delivery + Feedback & Improvement

    Holding Classes

    I then began to host the one-to-one online lessons to an animation student who could help me provide feedback on what was useful, what I could add when teaching, what was confusing, and what I should remove. While ideally, I wanted this to take place at set times, weekly ones over a few weeks, like a term, I had to adapt to both of our schedules so I could get the feedback I needed in time as well as be able to work on my other project.

    So, this is not strictly week by week, but more like whenever either had spare time to spend learning the concepts, with enough time to have a feedback and improvement session after the class for any suggestions that could be gone through and implemented.

    Lesson Documentation

    Lesson 1

    The first lesson happened quite later on as I had changed my idea and my codes quite a bit. This was quite daunting, but good to have a familiar face to give me feedback on my skills, and it ended up being pretty fun in the end, where we could exchange feedback, I could add code comments, etc. It went on for a while as I was mainly gathering feedback more than being a teacher.

    Lesson 2

    The second lesson happened the very next day, as I had to work with both our schedules if I wanted feedback to improve, rather than conduct it like a workshop. I had gotten a bit more familiar and confident here. Here, I gave them some homework, as I wanted the student repo to have some student work.
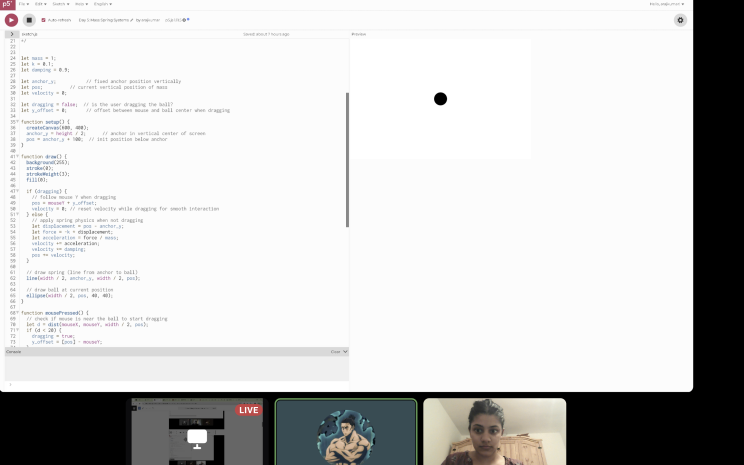
    Lesson 3

    Third lesson happened much later than the second by which time they had forgotten all the previous material. I made a note in the future improvements section of the documentation to ensure a knowledge check at the start of each lesson about the prior lesson as a quick recap. I was not going to implement these in this shorter time frame, but later on in the coming months.

    Lesson 4

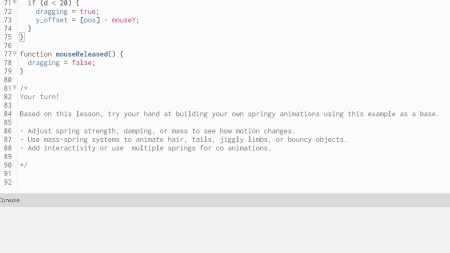
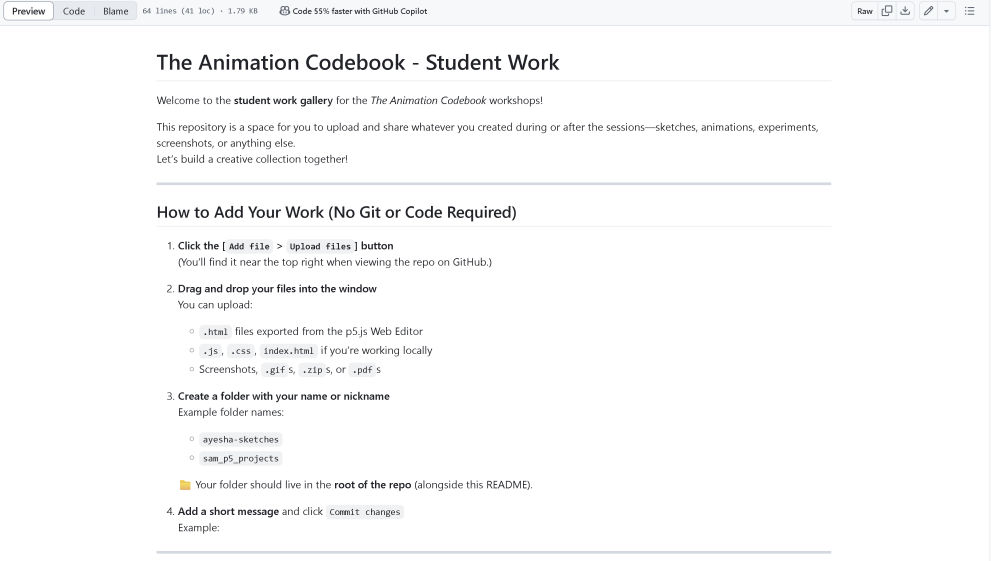
    The fourth and fifth lessons took place in the few days between the graduation project submission and this submission, during a particularly busy period for both the students and myself. However, I was able to gather significantly more feedback during these sessions, as I had no other major projects at the time. I saved much of this feedback for the blog, especially suggestions that required more time to implement—such as changes to the site’s aesthetics. On a positive note, the students managed to create some pieces for the student work repository, which was encouraging and a step forward in engagement. I kept those improvements noted in this blog for the future.
    Lesson 5

    In the final lesson, I was able to sit with both students throughout the session—for the lesson itself, a feedback discussion for my blog, and while creating the homework piece together. This session was particularly valuable, as it was during this time that I began actively implementing the student work repository and figuring out how it would function moving forward.

    Implementing Feedback

    After each lesson, I spent some time improving the lessons from the feedback session I held after each lesson. These were, namely and broadly covering all lessons:

    Adding Comments

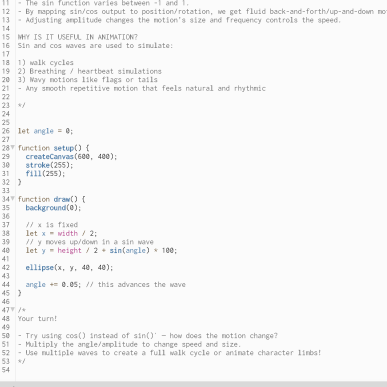
    I realised that adding comments to almost every line of code is crucial, especially for students who don’t have prior experience. It is wrong to assume anyone would automatically understand things like mouse interactions or even how to set up the canvas. Initially, I jumped straight into the class material to focus on conveying the physics principles behind animation effectively.

    However, I had to constantly remind about the fundamentals — like the coordinate system and basic p5.js concepts. I ensured that I did this for the following lessons, mostly where relevant to the topic. It is also helpful when they refer back to that sketch to inform their work – to know what exactly does what.

    Sharing + Making Curriculum Accessible

    Although I shared lesson links (such as p5.js editor URLs) afterwards, I was told this approach was inadequate. Instead, it would be much better to have a dedicated site or a GitHub page to hold all lessons together in one place, making it easier for students to access and follow the material consistently, and refer back when they wanted to.

    There was some discussion initially because I didn’t initially want to reveal the lesson plan before the lesson was held. However, afterwards I realised it was actually useful for the students to go through the material beforehand to be fully prepared.

    Also, having one central place to access all the lesson materials was important. So, I created a shared Notion workspace and informed them that there would soon be a publicly hosted website where all lessons would be readily and easily accessible, which was currently in the process of being made.

    Class Responses + Takeaways + Homework

    I originally did not have any class responses that I wanted as homework. After feedback, I realised that they found it quite fun and interesting, and wanted to research from both my class material and online and make their own work based on my code, and have somewhere to add that.

    In my lesson plan I only had a ‘tips for experimentation’ section, which was more of personal prompts where I could show what the code was practically doing by tweaking different values, and I thought I could take this further by asking the student to do this instead.

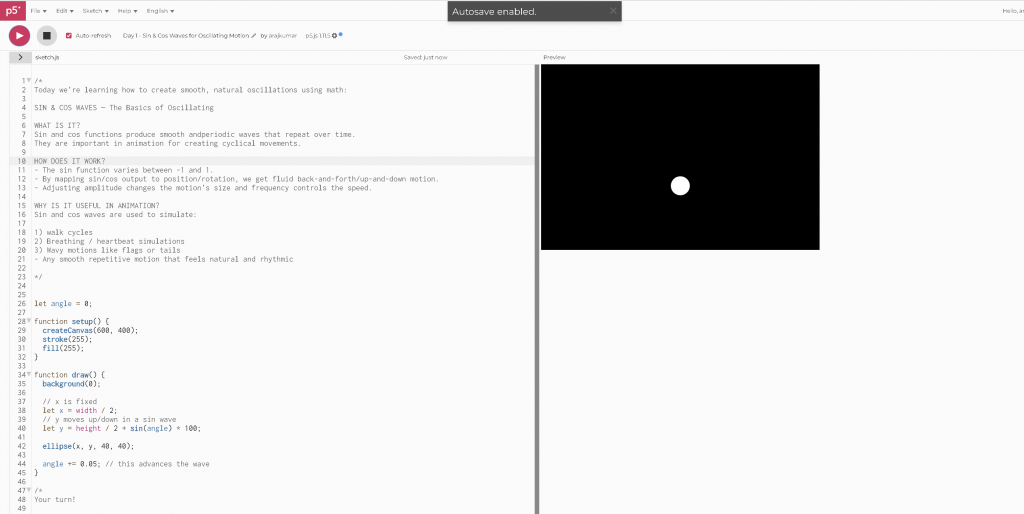
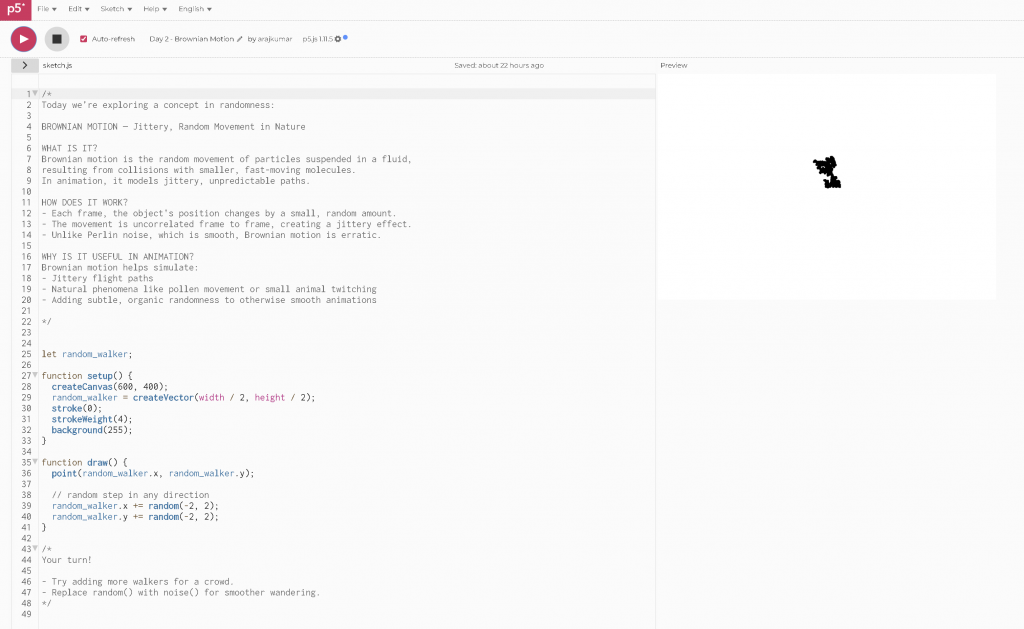
    I started by adding a small ‘Your Turn!’ section as a comment block under each P5.js lesson, not to tell students exactly what to do but prompt them to create class responses with a little nudge.

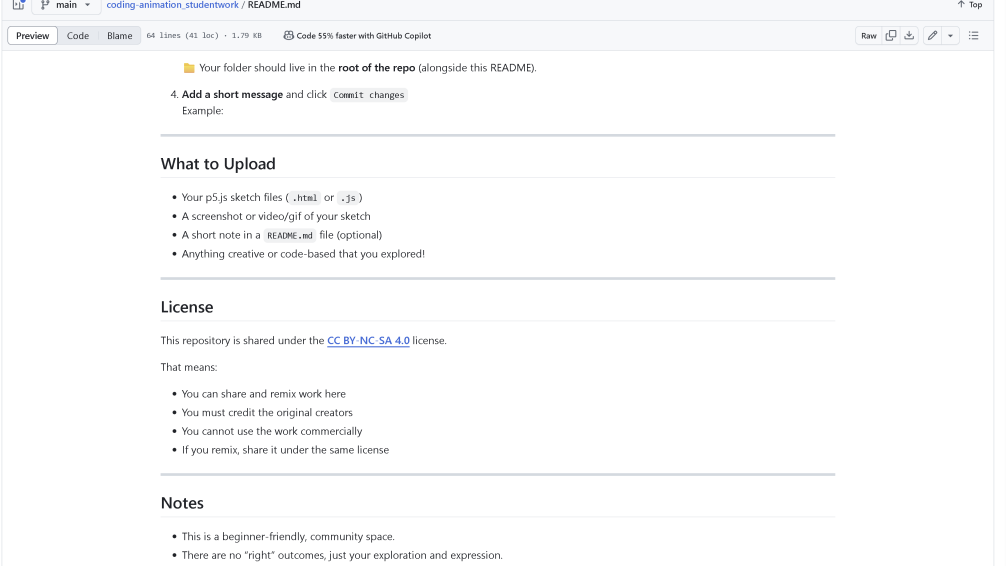
    I then began creating a public repository where they could add any class responses, with instructions that I thought were understandable for someone with little GitHub experience.

    I wasn’t entirely clear on how to structure the student work repository, so I explored similar repositories for inspiration—like thinkswell/javascript-mini-projects—which helped me better understand the structure and presentation I wanted. Based on that, I created some instructions which would allow for the building of a similar repository for my project.

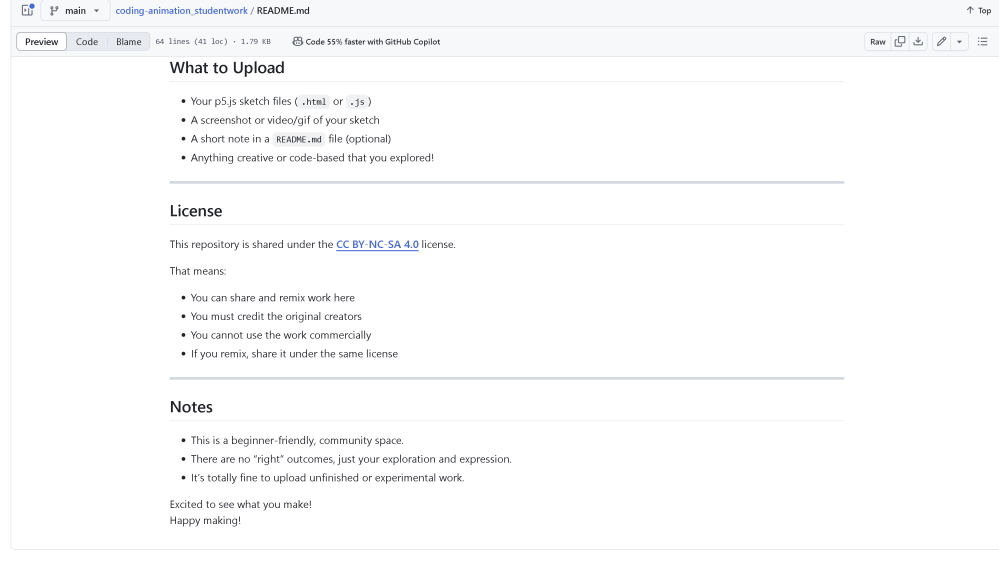
    In the ‘What to Upload’ section, I kept it fairly open, as I did not want anyone who didn’t have anything particularly ‘impressive’, unfinished or was unable to understand how to use the GitHub to be discouraged, like I initially was.

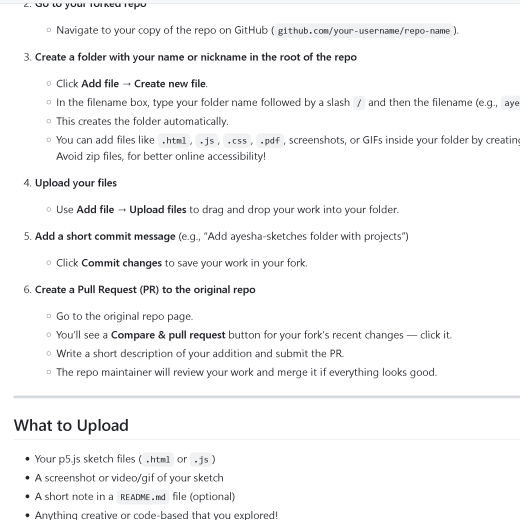
    In the final day of lessons, I asked the student to upload the work they had done after the lesson, some of which we worked on together just for guidance in the initial stages. This meant they had to open a GitHub account and initiate a pull request. I realised that my instructions here were quite unclear, and changed them accordingly.

    When uploading work, there were some confusions:

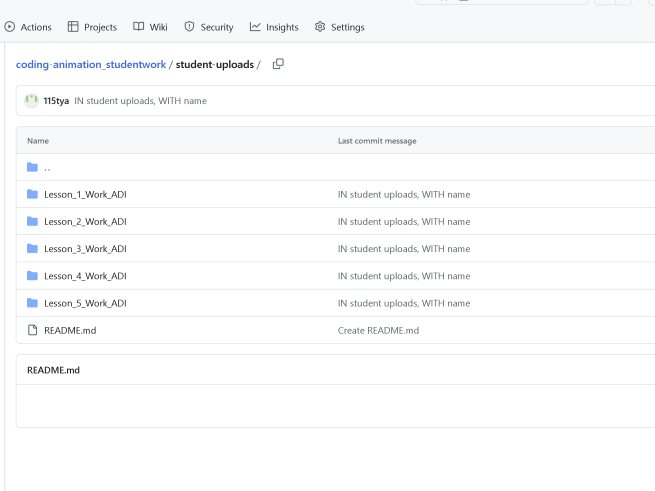
    • Student uploaded files without naming them with their name, so the files had no clear owner.
    • Uploading ZIP files directly made the repo hard to navigate because the code inside couldn’t be viewed easily on GitHub.
    • Not having a folder for student uploads so everything did not have a proper sorting,
    • This resulted in a cluttered repo with unclear file ownership.

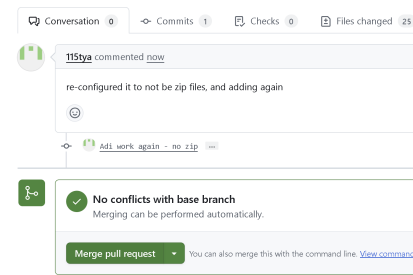
    To fix this, I got on call to clear up what was confusing so we could work through and improve this repository and my presentation of it step-by-step live, so it is as accessible as possible, and to ensure I did not miss anything. After reviewing, I merged their PRs, keeping the repository organised and clear.

    These are the things I did:

    1. Deleted original unclear uploads that were in zip format. Asked student to ensure they were unzipped, and that what they uploaded would have their name in it.

    2) Realized it would be better to create a dedicated folder for all student submissions. Created a folder named student-uploads at the root of the repo. Asked student to upload their work inside that student-uploads folder, in a subfolder named after themselves (e.g., student-uploads/aditya). Requested student to re-upload their work into that folder and then re-initiate a Pull Request.

    Lengthening Curriculum

    After the five lessons were over, I was also told that the curriculum could be bit longer, as animation has many more principles that can be communicated like this. I decided to work on this as a serious future project and aim for a more professional and lengthy curriculum, after teaching a few more students, and iteratively improving it after each piece of feedback.

    And naturally, it had to be tested on more than one person, but I received some confirmation that others would also try out this lesson plan in the coming weeks; namely, my mother, who has no coding experience at all, and a few more friends who have agreed to run through and provide ideas for both new material and improvements to existing material.

    I didn’t initially present this ‘homework’ as a strict requirement for the class, since it was still in a testing and improvement phase, but it was rewarding to see that homework had been done by the person I taught, and god to see they had gone out of their way to do research beyond the curriculum.

    Final Realisations

    I realised I had kept my code under the MIT License, but the student was not keeping it in the code when contributing to the repository. I was not sure about the best practice, but since the code was quite different, I did not make an effort to introduce undue complexity while I was still unsure when we had worked on it together anyway.

    As mentioned, it also needed strict timing, better structuring, and a weekly schedule to follow more professional guidelines. This was to be implemented later, as it came under more time consuming structural changes.

  • 3. Adding Licenses

    I then started exploring licenses, and in the tutorial, Marysia let me know that I had to add licenses to both my code and where the curricula would be seen and accessed. I initially considered using a permissive software license all around, such as the MIT License, due to its popularity and liberal terms, and ease. However, I decided against it for the curricula after realising that it allows unrestricted commercial use, including selling modified versions without the original creator’s consent, as long as credit is maintained. I then looked into more lesson material:

    https://opensource.guide/starting-a-project/#your-pre-launch-checklist

    https://help.github.com/articles/open-source-licensing/#where-does-the-license-live-on-my-repository

    https://pzwiki.wdka.nl/mediadesign/Open_licenses

    Since my project is rooted in education, collaboration, and openness, and not commercial gain, I chose the Creative Commons license in the end. It ensures that:

    • The material remains free and open for learning, remixing, and sharing.
    • It cannot be used commercially without permission.
    • Any adaptations must also be shared under the same license.

    After reviewing the different types of Creative Commons licenses, I decided to go with the most permissive one: CC BY (Attribution). While the code was written by me, I recognise that the curriculum as a whole is shaped by many influences—previous lesson plans, open educational resources, and my own experiences learning online would have influenced the way I approach the code. Because of this, I feel it’s important to be transparent and respectful of the collaborative nature of educational content. Choosing a permissive license ensures that others can freely use, adapt, and build on this work, just as I’ve been able to learn and create from the contributions of others.

    CREATIVE COMMONS LICENSE
    
    You are free to:
    Share — copy and redistribute the material in any medium or format for any purpose, even commercially.
    Adapt — remix, transform, and build upon the material for any purpose, even commercially.
    The licensor cannot revoke these freedoms as long as you follow the license terms.
    Under the following terms:
    Attribution — You must give appropriate credit , provide a link to the license, and indicate if changes were made . You may do so in any reasonable manner, but not in any way that suggests the licensor endorses you or your use.
    No additional restrictions — You may not apply legal terms or technological measures that legally restrict others from doing anything the license permits.
    Notices:
    You do not have to comply with the license for elements of the material in the public domain or where your use is permitted by an applicable exception or limitation .
    
    No warranties are given. The license may not give you all of the permissions necessary for your intended use. For example, other rights such as publicity, privacy, or moral rights may limit how you use the material.

    This license better reflects the project’s intention: empowering learners and encouraging collaborative knowledge-building.

    Upon more research, I found out that the MIT license, due to its nature, would be more suitable for the coding I had in my teaching curricula, and the Creative Commons License would be more appropriate for the curriculum or a potential website itself.

    MIT LICENSE CLAUSE
    
    Permission is hereby granted, free of charge, to any person obtaining a copy of this software and associated documentation files (the “Software”), to deal in the Software without restriction, including without limitation the rights to use, copy, modify, merge, publish, distribute, sublicense, and/or sell copies of the Software, and to permit persons to whom the Software is furnished to do so, subject to the following conditions:
    
    The above copyright notice and this permission notice shall be included in all copies or substantial portions of the Software.
    
    THE SOFTWARE IS PROVIDED “AS IS”, WITHOUT WARRANTY OF ANY KIND, EXPRESS OR IMPLIED, INCLUDING BUT NOT LIMITED TO THE WARRANTIES OF MERCHANTABILITY, FITNESS FOR A PARTICULAR PURPOSE AND NONINFRINGEMENT. IN NO EVENT SHALL THE AUTHORS OR COPYRIGHT HOLDERS BE LIABLE FOR ANY CLAIM, DAMAGES OR OTHER LIABILITY, WHETHER IN AN ACTION OF CONTRACT, TORT OR OTHERWISE, ARISING FROM, OUT OF OR IN CONNECTION WITH THE SOFTWARE OR THE USE OR OTHER DEALINGS IN THE SOFTWARE.

    This is because:

    The MIT License is specifically designed to handle software + code. It allows others to freely use, modify, and distribute the code you include in your teaching curricula without many restrictions, while protecting you legally as the author. This makes it ideal for any programming examples, tools, or interactive code snippets you provide.

    Creative Commons licenses are tailored for non-software creative works, such as lesson plans, textbooks, website content, videos, and other educational materials. They offer flexible terms for sharing and attribution that suit the way creative content is typically reused, adapted, and credited.

    Separating the licenses helps clarify how each part of your project can be used. The code portions are governed by the MIT License, enabling technical reuse and development, while the overall curriculum and website content fall under a Creative Commons license to encourage sharing and adaptation with appropriate attribution.

    Therefore, I decided to add the Creative Commons License to my website with the curriculum, which would be hosted publicly on GitHub, and within the code in the P5.js editor itself, use the MIT license.

    In the student repo containing coursework, I decided best to be more restrictive, as it was not my work. I was not sure about this fully, but went with what I thought was best from research into the class materials on licenses, deciding to alter them if I found them to be wrong as I delved further into learning.

  • 2. Creating the Lessons

    DayConceptKey Learning
    1Sin & Cos WavesOscillation / Cycles
    2Brownian MotionRandom motion
    3Perlin NoiseSmooth randomness
    4Fractal Brownian Motion (fBm)Layered complexity
    5Mass-Spring SystemsForce, bounce, interactivity

    The next step was creating the lesson sketches, which took up the largest portion of time. I carefully ensured all the materials were well-aligned, and included necessary explanations so the content would be easy to teach and understand. These would be edited and changed as I got feedback so they are understood as best they can be. I removed lesson 6 from the plan due to time issues, but they will soon be added in once completed.

    The sketches made for the lessons are here:

    https://editor.p5js.org/arajkumar/collections/Dv4yNVvXx

    Here, I also documented how I might want to approach my lesson in terms of teaching – experimenting with my own example, or building it from scratch in the class, while teaching to demonstrate the concepts, and prompts to expand and link it to animation. This, too, may have varied during the actual delivery of the lesson and may change when it is put onto the website after they are delivered and feedback has been implemented, but it provides a rough structure.

    Objective:
    To understand and visualise smooth oscillating motion using sine and cosine functions, useful for natural & rhythmic animations.

    Concept Overview:
    Sine and cosine functions generate smooth, periodic oscillations, which can be mapped to position / rotation to create natural, repeating movements. These functions cycle between -1 and 1 continuously, allowing for a fluid back-and-forth or up-and-down motion.

    Step-by-Step Approach:

    1. Set up the canvas: Create a simple black-and-white environment for clear visualisation.
    2. Define animation parameters: Initialise variables to control amplitude (motion size), frequency (speed), and phase (starting position).
    3. Calculate position: Use sin() or cos() functions with a time variable (usually frame count or elapsed time) to compute the oscillating value.
    4. Map sine output: Scale the sine output to the desired range on the screen, e.g., vertical or horizontal movement limits.
    5. Draw the object: Render a shape (like a circle) at the calculated position to visualise the oscillation.
    6. Animate over time: Increment the time variable continuously to produce ongoing smooth motion.

    Animation Applications:

    • Breathing effects
    • Walk cycles (limb oscillations)
    • Any repetitive, rhythmic motion that requires smooth transitions

    Tips for Experimentation:

    • Vary amplitude to change motion size.
    • Adjust frequency to speed up or slow down oscillations.
    • Combine sine and cosine for complex paths or phase shifts.
    • Layer multiple waves for more natural or complex effects.

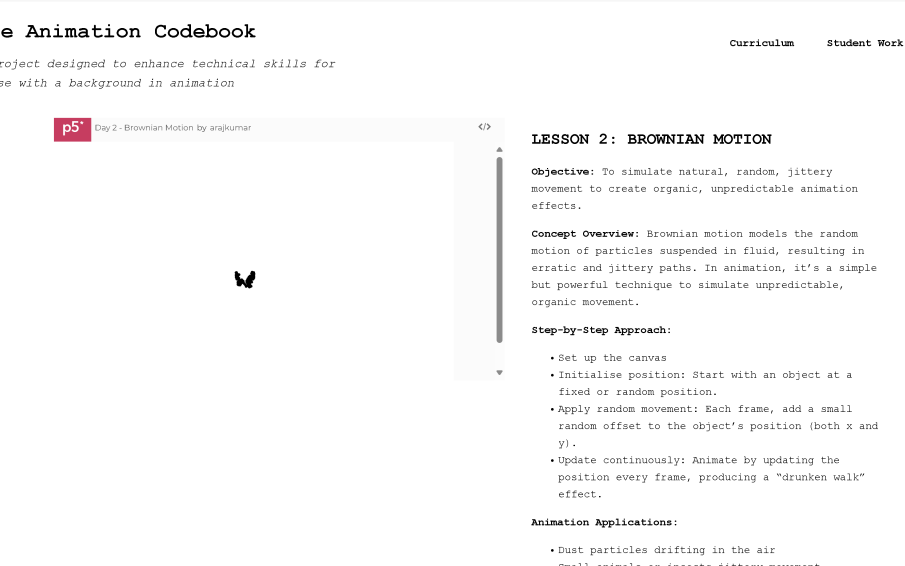
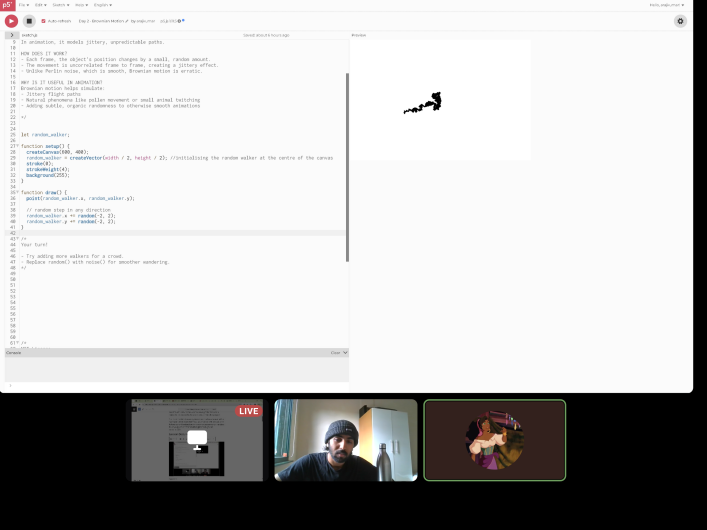
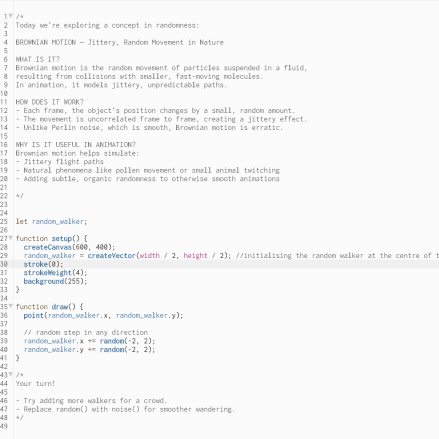
    Objective:
    To simulate natural, random, jittery movement to create organic, unpredictable animation effects.

    Concept Overview:
    Brownian motion models the random motion of particles suspended in fluid, resulting in erratic and jittery paths. In animation, it’s a simple but powerful technique to simulate unpredictable, organic movement.

    Step-by-Step Approach:

    • Set up the canvas: Use a black-and-white scheme to focus on movement clarity.
    • Initialise position: Start with an object at a fixed or random position.
    • Apply random movement: Each frame, add a small random offset to the object’s position (both x and y).
    • Update continuously: Animate by updating the position every frame, producing a “drunken walk” effect.

    Animation Applications:

    • Dust particles drifting in the air
    • Small animals or insects jittery movement
    • Leaf fluttering

    Tips for Experimentation:

    • Adjust size of the random offset to control jitteriness intensity.
    • Combine Brownian motion with other motion types for more complex behavior.
    • Use Brownian motion to add subtle natural variation to otherwise smooth animations.

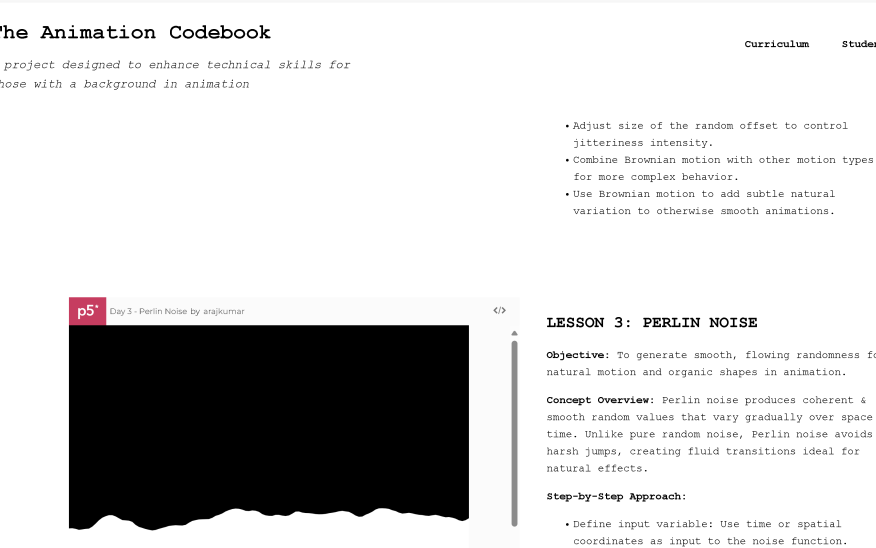
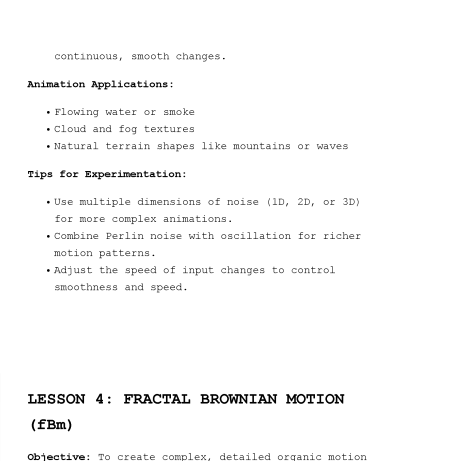
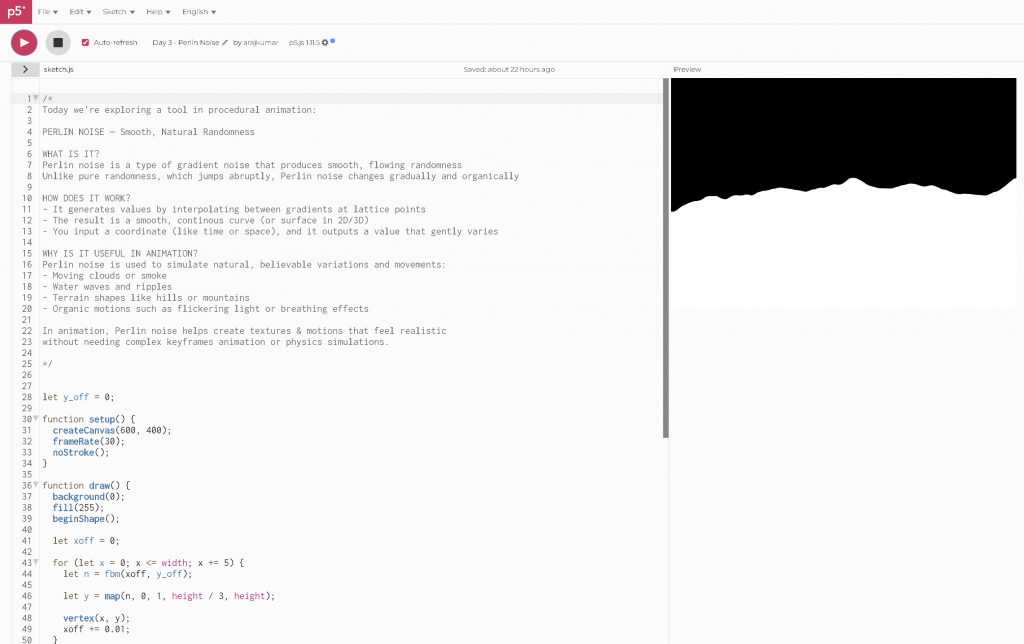
    Objective:
    To generate smooth, flowing randomness for natural motion and organic shapes in animation.

    Concept Overview:
    Perlin noise produces coherent & smooth random values that vary gradually over space or time. Unlike pure random noise, Perlin noise avoids harsh jumps, creating fluid transitions ideal for natural effects.

    Step-by-Step Approach:

    • Set up the canvas: Black-and-white style for easy observation of smooth changes.
    • Define input variable: Use time or spatial coordinates as input to the noise function.
    • Sample noise: Call noise() with the input variable to get a smooth value between 0 and 1.
    • Map output: Scale the noise output to desired position, color, or shape ranges.
    • Animate: Increment input variable over time for continuous, smooth changes.

    Animation Applications:

    • Flowing water or smoke
    • Cloud and fog textures
    • Natural terrain shapes like mountains or waves

    Tips for Experimentation:

    • Use multiple dimensions of noise (1D, 2D, or 3D) for more complex animations.
    • Combine Perlin noise with oscillation for richer motion patterns.
    • Adjust the speed of input changes to control smoothness and speed.

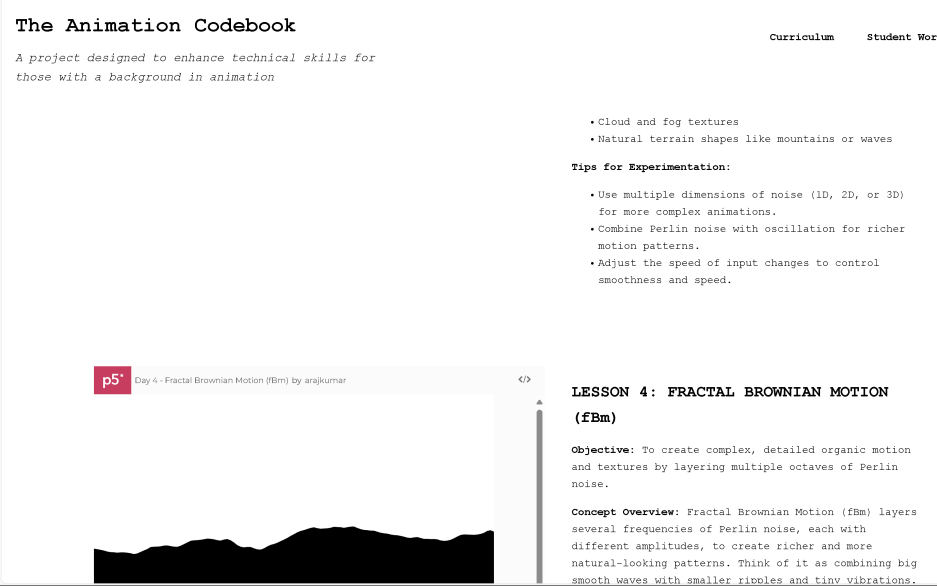
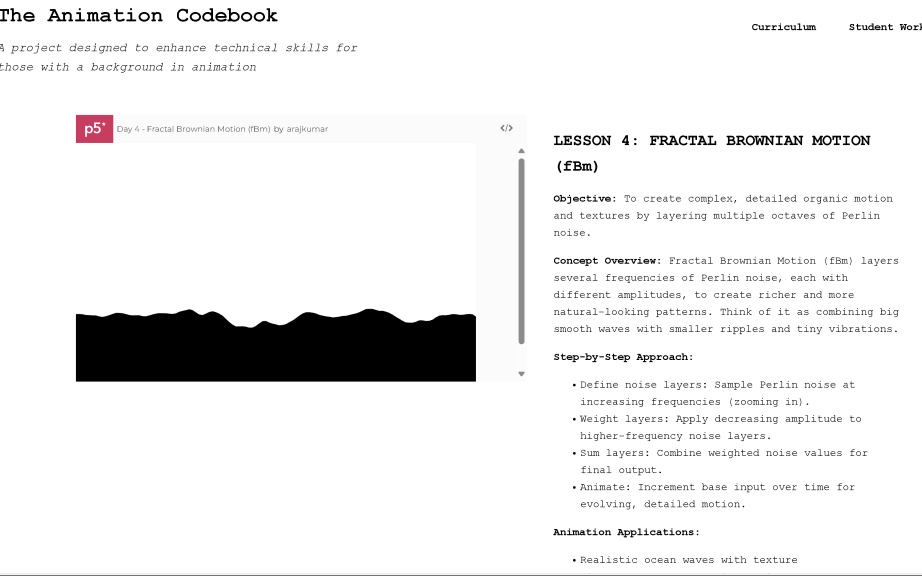
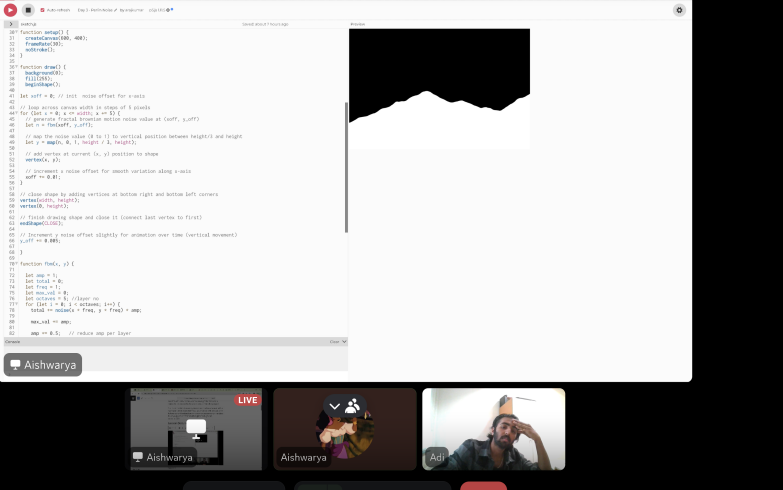
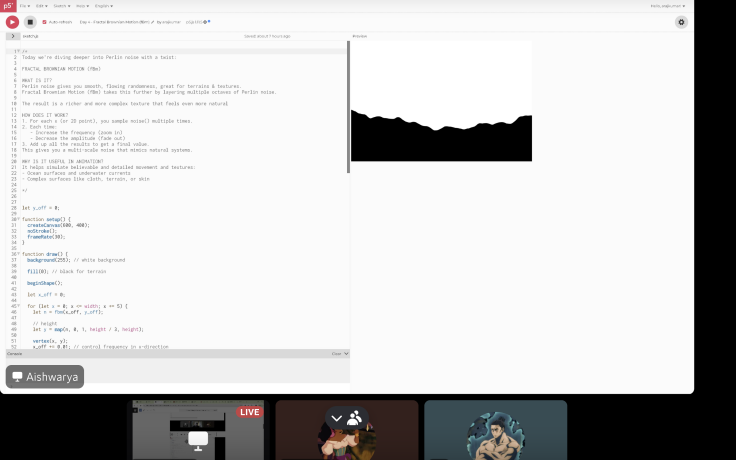
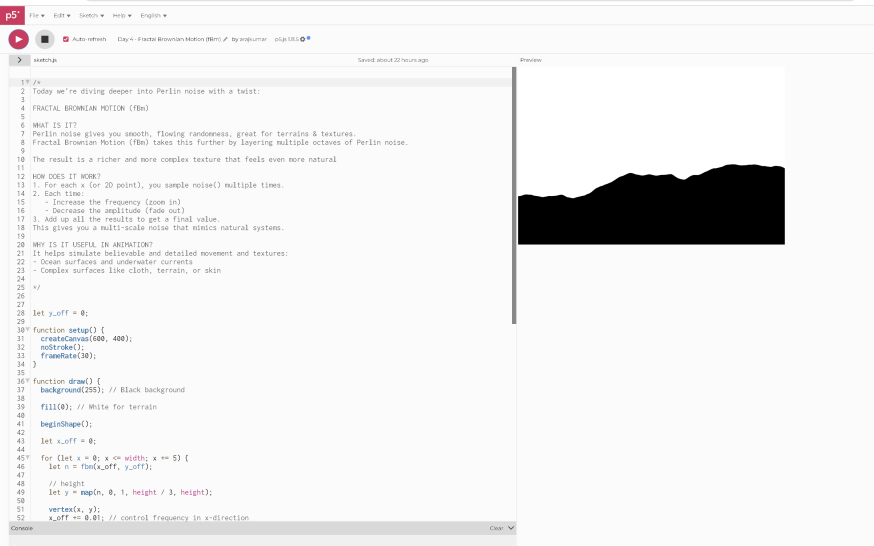
    Objective:
    To create complex, detailed organic motion and textures by layering multiple octaves of Perlin noise.

    Concept Overview:
    Fractal Brownian Motion (fBm) layers several frequencies of Perlin noise, each with different amplitudes, to create richer and more natural-looking patterns. Think of it as combining big smooth waves with smaller ripples and tiny vibrations.

    Step-by-Step Approach:

    • Set up the canvas: Keep it black and white for contrast.
    • Define noise layers: Sample Perlin noise at increasing frequencies (zooming in).
    • Weight layers: Apply decreasing amplitude to higher-frequency noise layers.
    • Sum layers: Combine weighted noise values for final output.
    • Animate: Increment base input over time for evolving, detailed motion.

    Animation Applications:

    • Realistic ocean waves with texture
    • Wind-blown grass or hair detail
    • Wrinkled fabric or skin textures
    • Atmospheric effects like clouds and fog

    Tips for Experimentation:

    • Adjust number of octaves and weights for different detail levels.
    • Mix with color or shape changes for richer effects.
    • Use as a base for procedural textures or terrains.

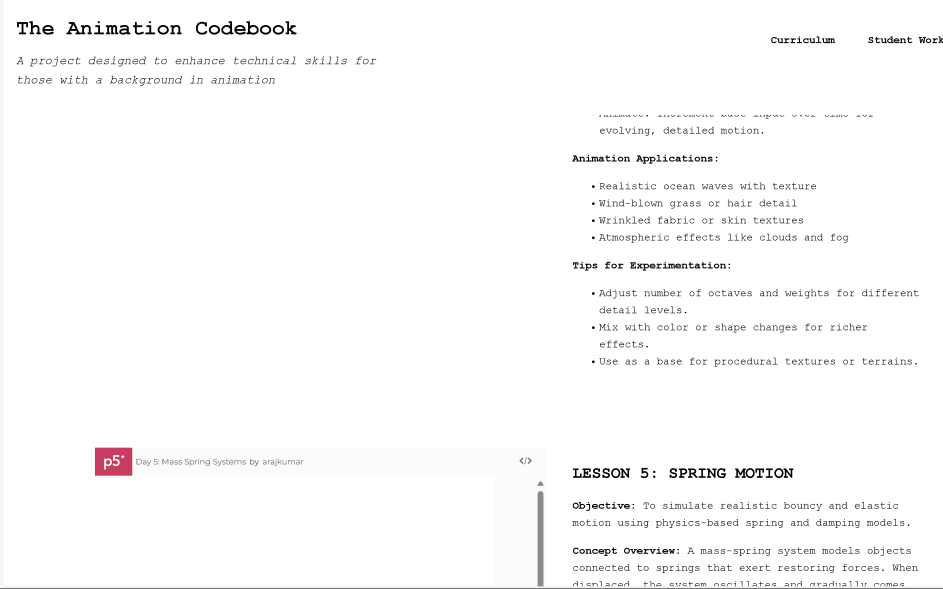
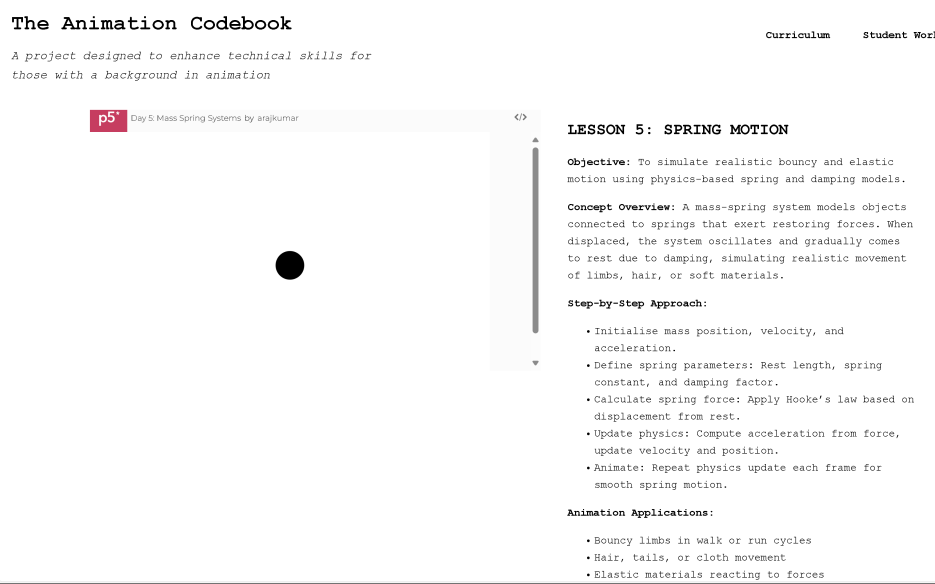
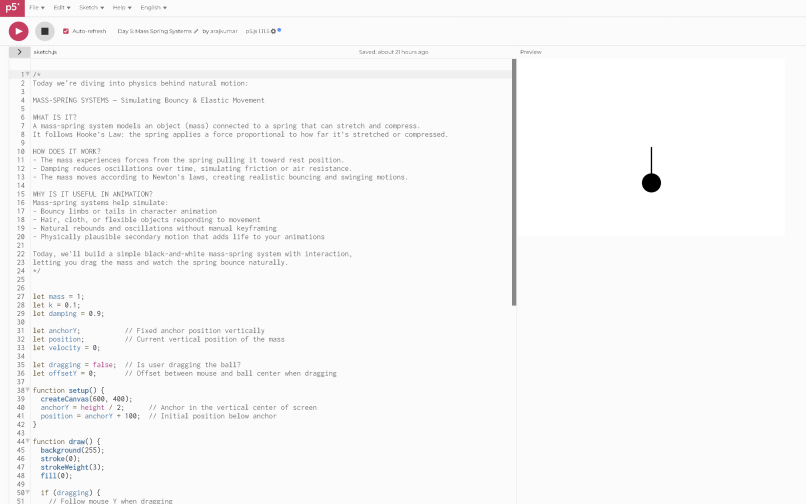
    Objective:
    To simulate realistic bouncy and elastic motion using physics-based spring and damping models.

    Concept Overview:
    A mass-spring system models objects connected to springs that exert restoring forces. When displaced, the system oscillates and gradually comes to rest due to damping, simulating realistic movement of limbs, hair, or soft materials.

    Step-by-Step Approach:

    • Set up canvas: Black-and-white for clarity.
    • Initialise mass position, velocity, and acceleration.
    • Define spring parameters: Rest length, spring constant, and damping factor.
    • Calculate spring force: Apply Hooke’s law based on displacement from rest.
    • Update physics: Compute acceleration from force, update velocity and position.
    • Animate: Repeat physics update each frame for smooth spring motion.

    Animation Applications:

    • Bouncy limbs in walk or run cycles
    • Hair, tails, or cloth movement
    • Elastic materials reacting to forces
    • Interactive objects with natural recoil

    Tips for Experimentation:

    • Tweak spring constant and damping for stiffer or softer springs.
    • Add user interaction to drag or push the mass.
    • Chain multiple springs for complex systems.

    // ChatGPT was used here to structure what I had mentioned for the lesson plan into neat components.

  • 1. Brainstorming + Curriculum

    I first tried to go with translation tasks – being able to speak 2 languages, I thought this would be the best approach for me. However, after having messaged various communities; FreeCodeCamp, Blender, Pontoon, and p5.js, I did not get a response with enough time to start working, likely because the language itself is not very widely spoken.

    I then spoke to my lecturer about adding to JavaScript Mini Projects, in which I could demonstrate some functionalities of the coding language and add it to a repository for new learners to refer to, but was told this, too, would not successfully meet the brief.

    During a lecture on non-code contributions, we learned that contributions go beyond translation tasks — including community-led workshops, creating curricula, and teaching students, with all associated resources and documentation being open source.

    Since my graduation project was already focused on animation, I thought it would be a great opportunity to create a curriculum and lead lessons that teach fundamental computer science concepts in animation — aimed at students who are familiar with the artistic aspects but may lack exposure to motion physics and the underlying computer science principles.

    I began by researching relevant material, starting with this article, which explores the intersection of physics and animation. From there, I selected a few key topics that would best illustrate foundational computer science and physics concepts for beginners. I then organized these topics to ensure a logical progression — both in terms of building on previous lessons and gradually increasing in difficulty.

    DayConceptKey LearningWhy It Fits
    1Sin & Cos WavesOscillation / CyclesEasiest, rhythmic, character basics
    2Brownian MotionRandom motionContrast with sin/cos
    3Perlin NoiseSmooth randomnessRealism, movement, texture
    4Fractal Brownian Motion (fBm)Layered complexityRicher natural effects (building on prior knowledge)
    5Mass-Spring SystemsForce, bounce, interactivityRigs, secondary motion
    6Systems & EmergenceCrowd behavior, swarming logicStory-level animation, procedural crowds

    After this, I began to work on p5.js sketches, which illustrate these concepts well and that I could use in my lesson delivery. These sketches would also be embedded into an educator website I was planning on creating, so any more workshops that took place with different or more people in the future could make use of them.

    I decided to only do the last one if I had time, working alongside the graduation project.